Did you know that a staggering 86% of businesses now use video assets in their creative campaigns?
It’s no wonder when videos pull in 300% more traffic than other content types and can boost organic website traffic by an impressive 157%. Yet despite these compelling numbers, creating videos often feels like climbing a mountain without proper gear. The video editing process can be downright overwhelming with its multiple stages and seemingly endless approval cycles. We say this because studies show that video projects with a structured workflow save up to 60% of turnaround time during review and approval phases.

The challenges are real. With 500 hours of video uploaded to YouTube every minute, standing out requires quality—not just quantity. Why do so many creators struggle? Because without a system, the process becomes fragmented and inefficient. After all, it takes about 23 minutes to refocus after being interrupted, making an organized workflow not just helpful but essential for productivity.
Here’s the good news – you don’t need fancy equipment or expensive software to create a streamlined video production workflow. Most creators get caught in the trap of thinking more tools equals better results, when in reality, structure and consistency are far more valuable.
In this article, we’ll walk you through simple, budget-friendly ways to organize your video production process from initial concept to final publish. Whether you’re a solo content creator or part of a small team, these strategies will help you produce better videos in less time without emptying your wallet.
Plan Your Video Before You Hit Record
“Using video to connect with a prospect is so much more than a cold call. It humanizes the selling process.” — Jill Rowley, Social Selling Evangelist and Startup Advisor
The foundation of any successful video project lies in thorough planning before you even touch your camera. According to research, pre-production planning significantly improves the efficiency of your video production workflow and saves valuable time during later stages.
Let’s face it – jumping straight into filming without a clear plan is like trying to build a house without blueprints. You’ll likely end up with something, but it probably won’t be what you envisioned. We say this because most creators focus solely on the technical aspects of video production while underestimating the power of proper planning.
Think about it – how many times have you found yourself re-shooting scenes or spending hours in editing trying to piece together a coherent story? This happens when we skip the crucial planning stage. A well-structured pre-production process not only clarifies your vision but also prevents those frustrating “I wish I had thought of that earlier” moments.
The beauty of planning is that it costs nothing but time and attention – resources well spent considering the headaches they’ll help you avoid later. And don’t worry, you won’t need fancy project management software or complex systems. Even a simple document or notebook can be powerful when used consistently.
Before we dive into the specifics, remember that planning isn’t about restricting creativity – it’s about creating a framework that allows your creative ideas to flourish without getting lost in technical chaos. As one filmmaker aptly puts it, “Creativity thrives within constraints.”
If you’re creating multilingual content, you may also benefit from creating multilingual courses with AI dubbing to extend your video’s reach to a global audience.
Plan Your Video Before You Hit Record
“Using video to connect with a prospect is so much more than a cold call. It humanizes the selling process.” — Jill Rowley, Social Selling Evangelist and Startup Advisor
The foundation of any successful video project lies in thorough planning before you even touch your camera. According to research, pre-production planning significantly improves the efficiency of your video production workflow and saves valuable time during later stages.
Define your goal and audience
Every great video begins with a purpose. Before rushing to hit that record button, pause and ask yourself, “Why am I creating this video?” Your answer might involve increasing brand awareness, driving sales, or educating your audience about a product or service.
Without a clear destination, any path will do—but that’s rarely the route to success. We say this because videos created without specific goals often meander, losing viewer interest and failing to deliver measurable results. To crystallize your purpose, consider these essential questions:
- What specific problem will your video solve?
- How does this align with your broader business objectives?
- What action do you want viewers to take after watching?
Understanding your audience is just as crucial as defining your goal. Your target viewers shape everything from your video’s length and format to its distribution platform and even technical setup. For instance, content targeting teenagers might work best when shorter, vertically oriented, and posted on TikTok, while employee training videos could be longer and hosted on internal platforms.
During this planning phase, resist the temptation to create videos that try to please everyone. Instead, focus on a specific audience segment with clearly defined needs and preferences. This targeted approach makes your message both clearer and more effective.
The beauty of having well-defined goals and audience is that it simplifies every decision that follows. When you know exactly who you’re speaking to and what you want them to do, choices about script, visuals, length, and tone become almost automatic rather than agonizing decisions.
Create a simple script or outline
A well-crafted script isn’t just helpful—it’s the backbone of your entire video. Without it, you’re essentially building a house without blueprints. Even if you’re an expert on your topic, don’t fool yourself into thinking you can “wing it” with a few bullet points. This common mistake often leads to countless retakes and hours of unnecessary editing time.
Best practices for organizing post-production also suggest maintaining a naming system that helps quickly identify versioning for repurposing.
When crafting your script:
- Hook your viewers in the first 10% of your video—this is when attention is highest and viewers decide whether to keep watching
- Structure your content logically, moving from basic concepts to more detailed information
- Keep paragraphs short and digestible, using language that feels conversational rather than formal
- Read everything aloud before recording—your ears will catch awkward phrasing that your eyes miss
Beyond your script, a simple storyboard can be incredibly valuable. Think of it as a comic-book version of your video that helps you visualize each shot before filming begins. This technique helps identify potential problems early and plan your shots more effectively, ultimately saving hours in your post-production workflow.
For videos with more complex narratives, start with what filmmakers call a “treatment”—a one-page outline of your concept. Begin with a single sentence summarizing your idea, then expand it into paragraphs representing the beginning, middle, and end of your story.
This first assembled version lets you see the forest before examining each tree. A rough cut also helps stakeholders visualize the final product early and reduces feedback cycles—a key insight from those creating videos for multilingual audiences.
This planning stage might feel like it’s slowing you down, but it’s actually doing the opposite. As videographer Hiroshi Hara puts it, “The goal is to resolve issues during preproduction so production can focus on performance and capturing the best image.” When you solve problems on paper rather than in the editing room, you free yourself to focus on creating quality content instead of fixing preventable mistakes.
Organize Your Footage Like a Pro
Did you know that editors waste up to 30% of their time just searching for footage when files aren’t properly organized? This isn’t just about being tidy—it’s about reclaiming hours of your workday that would otherwise vanish into the digital abyss. Let’s look at how you can set up systems that streamline your editing process without splurging on expensive tools.
Use folders and naming conventions
The foundation of any efficient post-production starts with a logical folder structure. Begin by creating these essential categories:
- Project Files: All your editing software project files
- Raw Footage: Unedited video files straight from camera
- Audio: Music tracks, voice-overs, and sound effects
- Graphics: Titles, lower thirds, and visual elements
- Exports: All versions of your final video
When setting up this structure, consistency trumps complexity every time. As one professional editor puts it, “It doesn’t matter so much what you do as long as you do it the same way every time.” This repeatability helps organization become second nature and trains your brain to develop good file management habits.
Why are naming conventions so crucial? Because generic camera-generated names like “DSC00001.MOV” tell you absolutely nothing about what’s inside. Instead, develop a system that includes:
- Project name
- Shooting date (YYYYMMDD format works best)
- Scene/location
- Take number
For example: “ProjectX_20240430_Interview_Take03.mp4” instantly tells you what’s inside without wasting time opening the file.
Always avoid special characters in filenames and use underscores (_) or dashes (-) instead of spaces, as some applications struggle with spaces. Keep names under 25-35 characters when possible for better readability across different systems.
Sort by type: video, audio, graphics
Once your folder structure is in place, organizing assets by type creates another layer of efficiency. Within your editing software’s project panel, this approach becomes even more powerful.
Most editing programs allow you to sort files by type automatically. In Premiere Pro, for instance, you can use color coding to quickly spot different media types. Clicking on column headers like “Label” groups similar files together, making it easier to find exactly what you need.
Video editors often overlook metadata as a secret weapon for organization. By adding descriptions, keywords, and other information to your files, you create multiple ways to search and filter your content. In Premiere Pro and similar programs, you can customize metadata fields to match your specific workflow needs.
Take advantage of bins (virtual folders within your editing project) to group related clips. Some editors swear by the “Pancake Timeline” technique that lets you drag clips directly from organized bins into your edit, dramatically speeding up your video editing workflow.
The system you choose should match your working style while remaining intuitive enough that anyone else looking at your project can understand it. As your projects grow more complex, this organization becomes not just helpful but essential for preserving your sanity and delivering quality work on deadline.
Edit Smarter with Free or Built-In Tools

Most creators think they need expensive software to produce professional videos. They don’t. Picking the right editing tools can slash your post-production time without emptying your wallet. Let’s explore how to edit smarter rather than harder.
Top free video editing software options
When choosing free editing software, match the tool to your specific needs and technical comfort level. DaVinci Resolve stands head and shoulders above other free options, offering professional-grade color correction and editing capabilities that rival industry standards like Premiere Pro. This powerhouse exports videos at up to 4K resolution at 60 frames per second, making it perfect for serious creators who want premium results without premium prices.
If you’re just starting out, VideoProc Vlogger offers an intuitive interface without sacrificing depth. Its clean design makes navigation straightforward, yet it packs advanced features like motion effects and color grading presets that you’d expect in paid software. As a bonus, it runs smoothly on older computers that might choke on more demanding applications.
For social media enthusiasts, Adobe Express shines at creating quick clips with templates specifically designed for TikTok and Instagram. Mac users already have a solid option in iMovie, which comes pre-installed and supports 4K exports right out of the box.
Based on your device, consider these platform-specific options:
- Windows/Mac/Linux users: DaVinci Resolve or Kdenlive (open-source)
- Chromebook users: KineMaster or web-based options like Clipchamp
- Mobile editors: CapCut (works across multiple platforms)
Use keyboard shortcuts to save time
Keyboard shortcuts are the secret weapon of professional editors. They’re like knowing the back alleys in a crowded city—they get you where you need to go much faster. Studies show that editors spend 10-15% less time on projects when they regularly use shortcuts.
Learning just a handful of common shortcuts can dramatically speed up those repetitive tasks that eat away at your editing time. In most editing programs:
- J, K, L keys control playback (reverse, pause, forward)
- Spacebar toggles play/pause
- I and O mark in/out points
- Z toggles timeline zoom
“The more you have to use your mouse while video editing, the slower you’ll be,” notes video editor Caleb Wojcik. He’s right. Each time you move your hand from keyboard to mouse, you’re adding tiny delays that accumulate into hours of wasted time. Focus first on mastering shortcuts for ripple delete, frame navigation, and clip selection.
You can even customize shortcuts in most editing software. In Premiere Pro, head to Edit > Keyboard Shortcuts, while Final Cut Pro users can find similar options under Final Cut Pro > Keyboard Shortcuts. This personalization lets you create a workflow that matches exactly how you edit.
Want to take efficiency a step further without spending much? Consider a programmable mouse with extra buttons that can be mapped to your most-used functions. This small investment pays dividends in time saved across every project you edit.
Simplify Post Production Workflow Without Fancy Software
Post-production doesn’t need to feel like rocket science. In fact, streamlining your video editing workflow often means removing complexity rather than adding more tools or steps. Let’s explore how to refine your process using techniques that work with virtually any editing software you already have.
Create a rough cut before fine-tuning
Think of a rough cut as sketching before painting—you’re mapping out the broad strokes of your story before getting lost in the details. This first assembled version lets you see the forest before examining each tree.
When creating your rough cut, focus on narrative flow rather than perfection:
- Place your clips on the timeline in the order they’ll appear in your final video
- Cut out obvious mistakes and unusable footage
- Create a structure that follows your script or storyboard
- Avoid obsessing over precise timing or transitions yet
This approach offers powerful advantages. First, you’ll spot any story problems or missing footage early—when they’re still easy to fix. Second, you can share this version with stakeholders for feedback before investing hours in detailed edits. As Martin Scorsese once noted, “If you don’t get physically ill seeing your first rough cut, something is wrong”.
Your rough cut serves as a blueprint for everything that follows. Once approved, you can move forward with confidence knowing the foundation is solid, saving yourself from the frustration of extensive rework later in your workflow.
Use basic color correction and audio tools
Many creators assume color correction requires specialized knowledge, but the basics are surprisingly straightforward. The editing software you already have includes fundamental correction tools that can dramatically improve your footage.
Start with these simple adjustments:
- White Balance: Make whites look truly white using the white balance selector
- Exposure: Adjust brightness using waveform scopes to ensure proper levels
- Contrast: Modify the difference between dark and light areas to add depth
For audio improvements, clarity should be your first priority. Use built-in noise reduction to clean up background hum, normalize audio to maintain consistent volume throughout, and apply basic equalization to make voices crisp and clear.
Remember, these corrections should aim for natural-looking results rather than dramatic effects. As one colorist puts it, “Color correction provides visual consistency, where balancing and evening the colors is everything”.
By mastering these fundamental techniques in your current editing software—whether free or basic—you’ll create professional-looking results without spending a fortune on specialized tools. The key is developing a methodical approach that addresses the essentials first before moving to more complex enhancements.
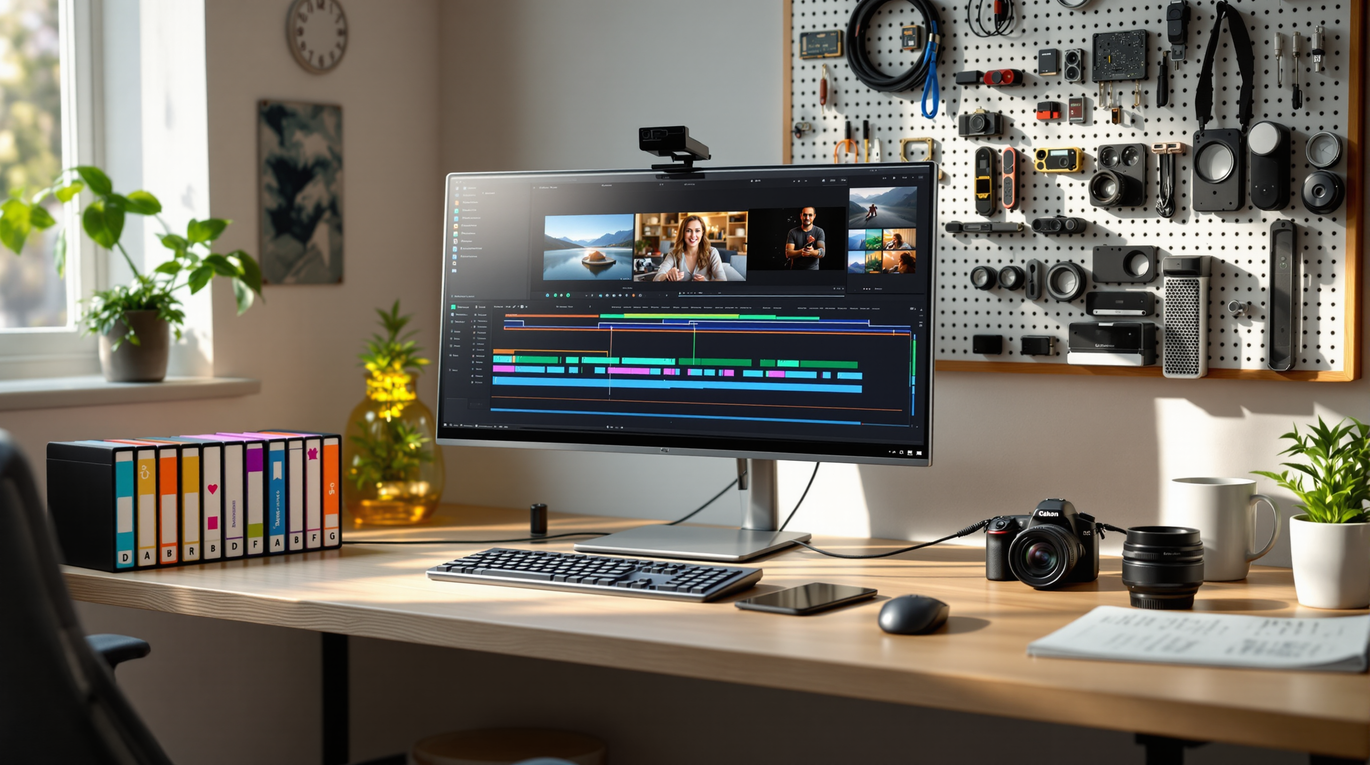
The Simple Way to Streamline Your Video Production Workflow (Without Expensive Tools)
!Hero Image for The Simple Way to Streamline Your Video Production Workflow (Without Expensive Tools)
Did you know that a staggering 86% of businesses now use video assets in their creative campaigns?
It’s no wonder when videos pull in 300% more traffic than other content types and can boost organic website traffic by an impressive 157%. Yet despite these compelling numbers, creating videos often feels like climbing a mountain without proper gear. The video editing process can be downright overwhelming with its multiple stages and seemingly endless approval cycles. We say this because studies show that video projects with a structured workflow save up to 60% of turnaround time during review and approval phases.
The challenges are real. With 500 hours of video uploaded to YouTube every minute, standing out requires quality—not just quantity. Why do so many creators struggle? Because without a system, the process becomes fragmented and inefficient. After all, it takes about 23 minutes to refocus after being interrupted, making an organized workflow not just helpful but essential for productivity.
Here’s the good news – you don’t need fancy equipment or expensive software to create a streamlined video production workflow. Most creators get caught in the trap of thinking more tools equals better results, when in reality, structure and consistency are far more valuable.
In this article, we’ll walk you through simple, budget-friendly ways to organize your video production process from initial concept to final publish. Whether you’re a solo content creator or part of a small team, these strategies will help you produce better videos in less time without emptying your wallet.
Export and Deliver with Consistency
The export phase is where your creative vision finally meets your audience. Think of it as the bridge connecting your hard work to your viewers’ screens. Getting this step right isn’t just important—it’s make-or-break for how your content will be received.
Choose the Right Format for Your Platform
Different platforms have different appetites when it comes to video formats. For YouTube, Vimeo, and most website embeds, H.264 (.mp4) gives you the sweet spot between quality and compatibility. This format supports hardware encoding for faster exports while keeping your video looking crisp and professional.
Key settings to have on your radar:
- Resolution: 1080p (1920×1080) for standard HD videos or 4K (3840×2160) if you’re aiming for maximum quality
- Frame rate: Match what you shot with—typically 24, 30, or 60fps (going back and forth creates jittery playback)
- Bit rate: 20-30 Mbps works well for HD content, while 4K demands 60-80 Mbps
- Audio: AAC format at 48kHz sample rate, ideally at 320 Kbps for crystal-clear sound
Social platforms each have their own quirks. Instagram caps out at 1080p and 30fps, while TikTok thrives on vertical 9:16 videos. Getting these settings wrong is like showing up to a formal event in beach shorts—technically you’re there, but you’re not making the impression you wanted.
For clients expecting broadcast-quality deliverables, consider ProRes or other “mezzanine” codecs. They preserve maximum quality but come with file sizes that could make your hard drive weep.
Keep a Final Folder for All Exports
Nothing wastes time faster than hunting for “the right version” of a video when a client or teammate needs it immediately. Set up a dedicated “Exports” or “Finals” folder that houses only delivery-ready files. This simple step can save you from frantic searching when deadlines loom.
We recommend adopting a naming convention that tells you everything about the file at a glance:
ClientName_ProjectName_Version_Resolution_AspectRatio_FrameRate_Codec_Platform_Date.ext
So instead of cryptic names like “Final_v2_REALLY_FINAL.mp4,” you’d have something like: ClientCompany_ProductLaunch_Final_1080p_16x9_60fps_H264_YouTube_20250430.mp4
One look and you know exactly what you’re dealing with.
But don’t stop there! Most editing programs let you save custom export settings as templates. This means you can set up perfect exports for YouTube, Instagram, and client delivery once, then apply them with a single click for every future project. It’s like having a personal assistant who remembers every technical detail so you don’t have to.
The secret to a smooth export process isn’t fancy gear or expensive plugins—it’s consistency. When you follow the same steps every time, you eliminate confusion and ensure quality across all your video deliverables, whether you’re a solo creator or part of a bustling production team.
Streamline Your Workflow Today
Creating professional-quality videos doesn’t need fancy equipment or wallet-draining software. The real secret? A structured workflow that suits your specific needs. Throughout this article, we’ve shown how thoughtful planning slashes time during later production stages, while organized file systems prevent that maddening hunt for missing footage.
Free editing tools like DaVinci Resolve and VideoProc Vlogger pack surprising power without the premium price tag. We say this because studies show that even simple tactics like keyboard shortcuts can trim your editing time by 10-15%, regardless of which software you’re using. The difference between amateur and professional-looking content often isn’t expensive gear—it’s attention to fundamentals like rough cuts before fine-tuning and basic color correction.
Your video production process should embrace simplicity over complexity. From initial concept through final export, each step builds upon the last, creating a smooth workflow that produces better videos in less time. Whether you’re a solo creator shooting in your home office or part of a small team, these techniques scale to fit your situation.
The perfect workflow is never static—it evolves with practice. Start implementing these strategies with your next project, and you’ll quickly discover which elements make the biggest difference for your specific style and content. After all, true efficiency isn’t about cutting corners—it’s about removing unnecessary obstacles so your creativity can flourish.
Remember that consistency is the bedrock of productivity. When you follow the same organized approach each time, your brain develops muscle memory for the process, making each subsequent project faster and less stressful than the last. Your viewers won’t see the system behind your videos, but they’ll definitely notice the polished results.
FAQs
Q1. How can I improve my video production workflow without expensive tools? You can streamline your workflow by planning your video before recording, organizing footage efficiently, using free editing software, focusing on basic color correction and audio tools, and maintaining a consistent export process. These steps can significantly enhance your productivity without breaking the bank.
Q2. What are some good free video editing software options? Some excellent free video editing software options include DaVinci Resolve for comprehensive editing and color correction, VideoProc Vlogger for beginners, Adobe Express for social media content, and iMovie for Mac users. These tools offer a range of features suitable for different skill levels and project needs.
Q3. How important is pre-production planning in video creation? Pre-production planning is crucial in video creation. It helps define your goals, target audience, and content structure. A well-planned video can save up to 60% of turnaround time during review and approval phases, making the entire production process more efficient.
Q4. What’s the best way to organize video footage? The best way to organize video footage is to use a logical folder structure, implement consistent naming conventions, and sort files by type (video, audio, graphics). This system helps reduce the time spent searching for files and streamlines the editing process.
Q5. How can I ensure my exported videos are optimized for different platforms? To optimize your exported videos for different platforms, choose the right format (typically H.264 for most online platforms), adjust resolution and frame rate to match platform requirements, and use appropriate bit rates. Keep a final folder for all exports with a standardized naming convention to easily identify the right version for each platform.