Subtitles offer a way to engage audiences on a deeper level, allowing them to comprehend the content and context without relying on audio. With the rise of silent video consumption, where a considerable 85% of videos on platforms like Facebook are watched without sound, subtitles have become indispensable.
If Adobe Premiere Pro is your preferred video editing tool, this guide will walk you through the process of seamlessly adding subtitles to your videos.
How to Add Subtitles in Premiere Pro?
Import Your Video Footage.
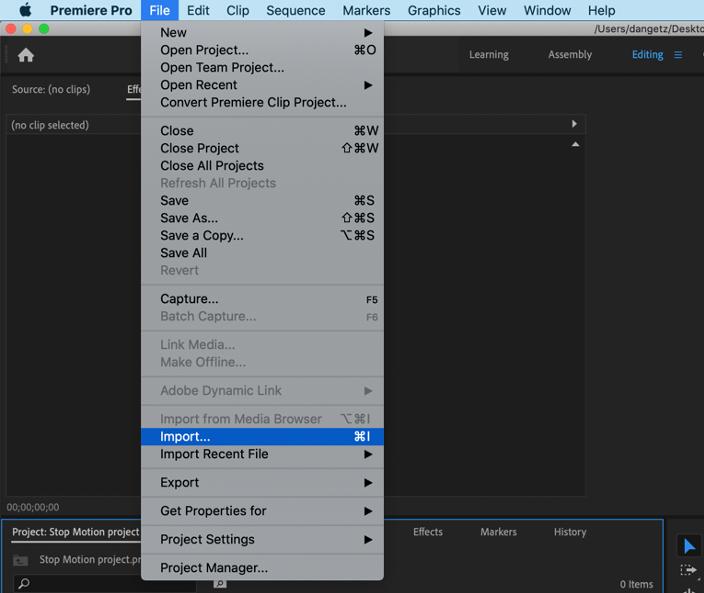
Before diving into the world of AI-driven subtitles, you’ll need to import your video footage into Adobe Premiere Pro. This initial step sets the stage for the exciting automation that follows.
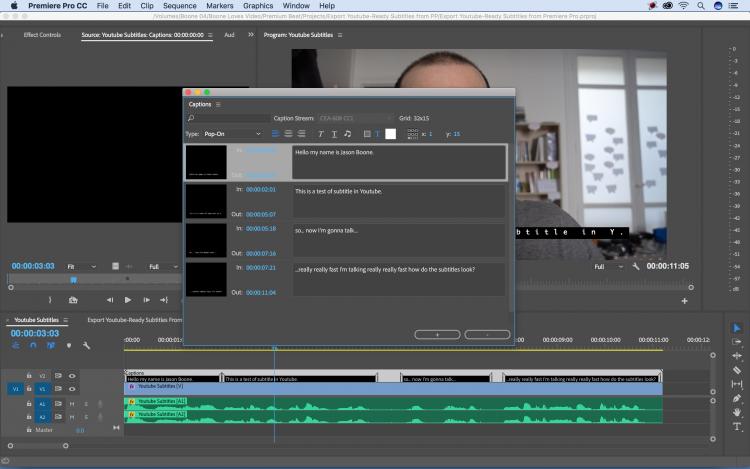
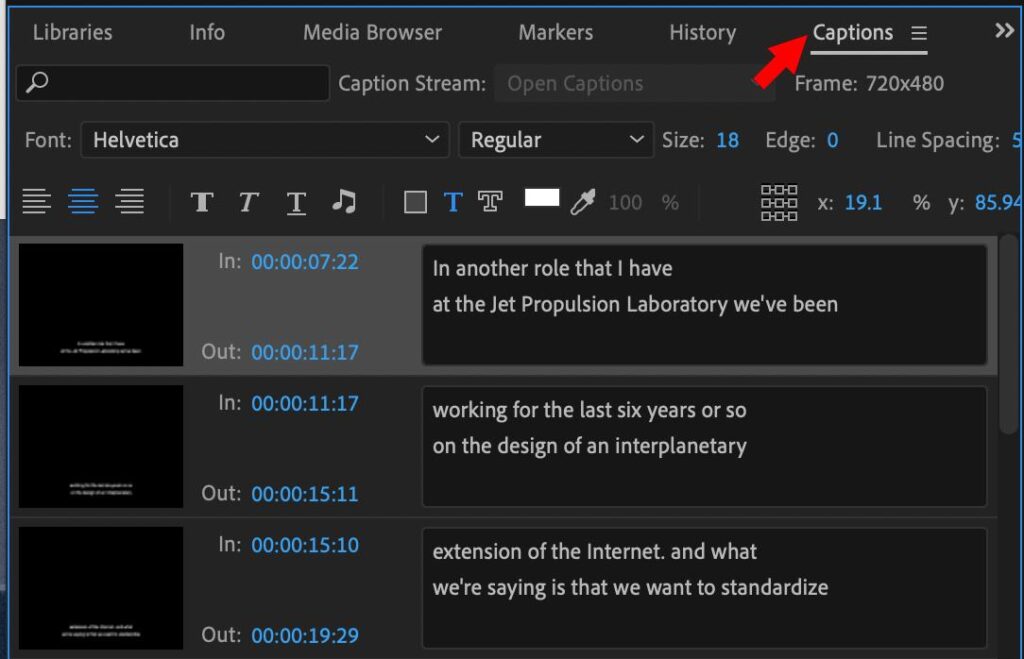
Open the Caption Window.
Once your footage is imported, head to Adobe Premiere Pro’s caption window to initiate the magic.
Explore Your Options.
Adobe Premiere Pro offers you a trio of subtitle integration options, all designed to make the process smoother and more efficient. These options are: auto transcription, manual captioning, and importing pre-existing subtitle files.
Auto Transcription:
Auto transcription is a game-changer when it comes to quickly generating subtitles for your videos. Here’s how to use this option:
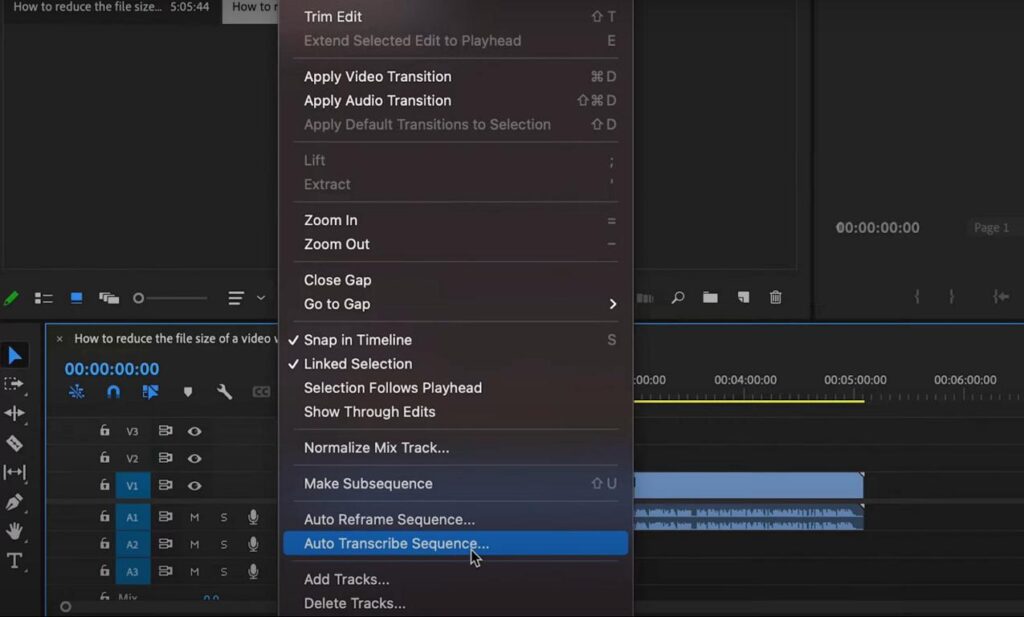
Step 1: After opening the caption window in Adobe Premiere Pro, click on the “Auto Transcribe” button. This action will prompt the software to analyze the audio in your video and generate a preliminary transcript.
Step 2: Fine-tune the auto-generated transcript by making necessary edits. The AI may not always capture specialized terms or accents accurately, so review and correct any inaccuracies.
Step 3: Once the transcript is refined, you can automatically convert it into subtitles. Adobe Premiere Pro will place the subtitles at the appropriate timecodes in your video.
Step 4: Review the placement of the subtitles and make any necessary adjustments to ensure they sync perfectly with the spoken words.
Step 5: Customize the style of the subtitles, adjusting font, color, size, and other visual elements to match your video’s aesthetic.
Manual Captioning:
Manual captioning gives you precise control over the subtitles, allowing you to add a personal touch to your video. Here’s how to manually create subtitles:
Step 1: Open the caption window and select the “Add Caption” option. A subtitle box will appear in the caption track of your timeline.
Step 2: Listen to the audio in your video and manually type the corresponding dialogue into the subtitle box. Continue this process for each section of dialogue in your video.
Step 3: Adjust the timing of each subtitle to ensure it appears and disappears at the right moments. Adobe Premiere Pro provides tools for easy timing adjustments.
Step 4: Customize the style of each subtitle individually or apply a consistent style to all manually added subtitles.
Importing Pre-existing Subtitle Files:
If you already have subtitle files in a compatible format, you can import and integrate them seamlessly into your video. Here’s how:
Step 1: Open the caption window and choose the “Import Captions” option.
Step 2: Select the subtitle file (common formats include SRT, VTT, and SCC) from your computer’s storage.
Step 3: The imported subtitles will appear in the caption track of your timeline. Review their placement and adjust timing if needed.
Step 4: As with other subtitle integration methods, you can customize the style of the imported subtitles to match your video’s look.
Harnessing AI for Efficient Subtitle Creation
If manually adding subtitles sounds too exhaustive, you’ll be relieved to hear about the recent leaps made in artificial intelligence technology.
Third-party subtitle generator tools use machine learning algorithms to analyze audio files and automatically create subtitles. Meaning, your computer does the listening, typing, and syncing for you. It’s faster, more accurate, and greatly reduces the workload, especially when dealing with longer videos or tighter timelines.
Here’s how you can auto generate and download accurate, time-coded subtitles in multiple languages using an AI tool:
This significant evolution in technology enables you to dedicate more time to other aspects of video editing, making the entire process more productive and efficient.
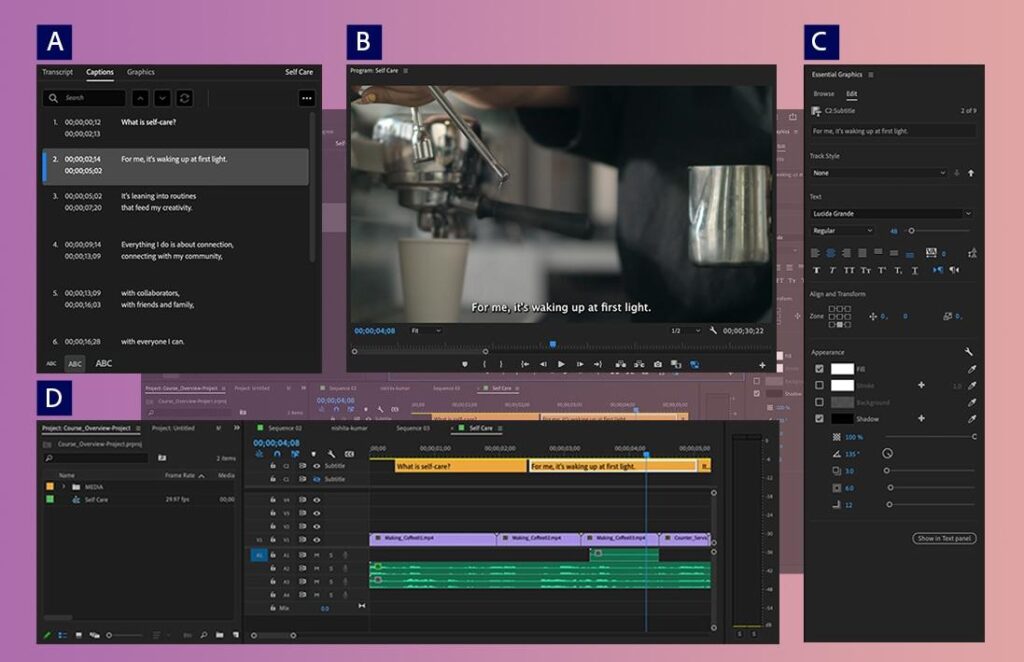
Personalizing Your Subtitles: Aesthetic and Semantic Perspectives
Creating subtitles is more than just reproducing dialogue text; personalizing them to suit your video’s overall aesthetics and cater to your brand identity is equally important. You can change the style, size, color, and position of your subtitles in Premiere Pro.
The ‘Essential Graphics Panel‘ in Premiere Pro lets you do just that. It offers a plethora of options to modify and tailor the font, color, underline, and shadow of your subtitles. You can also play around with your captions’ positioning to ensure they don’t obstruct any important visuals on screen. These customization options let you style your subtitles so they harmonize with the overall design of your video and strike a balance between visibility and aesthetic appeal.
By customizing your subtitles, you’re not only making them visible but also reinforcing your branding and enhancing the viewing experience.
Exporting Your Subtitle Files: A Must for YouTube
After dedicating time and effort towards creating and stylizing your subtitles, the next important task is exporting the caption file separately from the video file. This is particularly necessary while uploading videos on platforms like YouTube that accept a standalone subtitle file.

To export subtitles from Premiere Pro, go to your sequence and choose File > Export > Media. This will open up the export settings dialogue box. Next, select the format and then navigate to the ‘Captions’ tab. From here, choose ‘Create Sidecar File’ and select the format for your subtitle files. After you’ve made sure all settings are correct, click on ‘Export’ to finalize the process.
An added advantage of exporting your subtitles separately is the flexibility it provides. Users can choose to toggle subtitles on and off depending on their preference, which can further improve the viewability and accessibility of your content.
Congratulations! You’re ready to enhance your videos with automatic subtitles. By embracing these innovations, you’ve not only expanded your audience but also enriched their viewing experience. Accessibility and engagement go hand in hand, and with Adobe Premiere Pro’s AI-powered subtitle integration, you’re well-equipped to captivate a global audience.